Woodworking tips and tricks: master your craft today
Woodworking tips and tricks include mastering basic techniques, maintaining tools, and creating a dedicated workspace to enhance your skills and productivity while avoiding common mistakes.
Woodworking tips and tricks can transform your projects from ordinary to extraordinary. Have you ever wondered how some woodworkers create such stunning pieces? Dive into these insights and elevate your craft!
Essential tools for woodworking beginners
Getting started in woodworking requires the right tools. For beginners, having essential tools can make the learning process smoother and more enjoyable. Here are some must-have tools:
1. Hand Saw
A good hand saw is essential for making straight cuts in wood. Look for a crosscut saw for general cutting and a rip saw for cutting along the grain.
2. Claw Hammer
A claw hammer is ideal for driving nails and removing them. Choose a hammer that feels comfortable in your hand and is the right weight for your tasks.
3. Tape Measure
Measuring accurately is crucial in woodworking. A sturdy 25-foot tape measure will help you get precise measurements.
4. Square
A carpenter’s square is vital for checking and marking right angles. It ensures your cuts are straight and helps keep your projects square.
5. Chisels
A basic set of chisels will allow you to work on joints and refine your cuts. Start with a few essential sizes and add more as needed.
6. Power Drill
A cordless power drill is a handy tool for drilling holes and driving screws. It speeds up tasks significantly and is versatile for many projects.
7. Workbench
Having a sturdy workbench is essential for any woodworker. It provides a reliable surface for your projects and can be customized for your specific needs.
8. Safety Gear
Never forget to invest in safety gear. Safety glasses and ear protection will help keep you safe while you work.
Equipping yourself with these essential tools will help you build a strong foundation in woodworking. As you become more experienced, you can expand your tool collection based on your interests and projects!
Choosing the right wood for your project

Choosing the right wood for your project is essential for achieving the desired results. Different types of wood have unique properties that can affect the look and durability of your final piece. Here are some key considerations:
1. Understand Wood Types
Wood generally falls into two categories: hardwood and softwood. Hardwoods come from deciduous trees and are typically denser and more durable, making them ideal for furniture. Softwoods, from coniferous trees, are often lighter and easier to work with, suitable for projects like framing and indoor décor.
2. Consider Grain Patterns
The grain pattern of wood can enhance or detract from your design. For a stunning visual impact, choose woods like oak or walnut, which have beautiful grains. Simpler projects might benefit from softer woods like pine, which is readily available and inexpensive.
3. Assess Wood Stability
Some woods are more stable than others. For instance, maple is less prone to warping, making it a great choice for cabinets. It’s vital to select wood that matches the environmental conditions of your project to prevent future issues.
4. Think About Finish Compatibility
Different types of wood take finishes differently. For example, mahogany absorbs stain well, while birch may require more preparation. Always test your finish on a small piece before applying it to your entire project to ensure you achieve the desired effect.
5. Sustainability Matters
Whenever possible, choose wood from sustainable sources. Look for products certified by organizations like the Forest Stewardship Council (FSC). This choice not only supports good practices but also helps protect the environment.
By keeping these factors in mind when choosing wood, you can enhance the quality and aesthetic of your woodworking projects while ensuring they meet your functional needs!
Basic woodworking techniques everyone should know
Mastering basic woodworking techniques is essential for anyone looking to enhance their skills. Here are some fundamental techniques every woodworker should know:
1. Measuring and Marking
Accurate measurements are critical in woodworking. Always use a reliable tape measure and a square to ensure your cuts are straight. Mark your measurements clearly to avoid confusion.
2. Cutting
Understanding how to make clean cuts is key. Use a hand saw or power saw to cut wood along your markings. Always follow safety protocols and keep your blades sharp for the best results.
3. Drilling
Drilling holes is a fundamental skill in woodworking. Use a power drill for consistency and speed, or a hand drill for precision. Practice different drilling techniques to understand how they affect your projects.
4. Joining Pieces
There are many ways to join wood pieces, including using wood glue, screws, and dowels. Each method has its strengths, so experiment to find what works best for your projects.
5. Sanding
Sanding is crucial for finishing your project. Use different grits of sandpaper, starting from coarse and moving to fine, to achieve a smooth finish. Remember to sand with the grain to avoid scratches.
6. Finishing
Applying a finish protects your wood and enhances its beauty. You can use paints, stains, or oils, depending on the desired effect. Always test your finish on a scrap piece of wood first.
7. Safety Practices
Safety should always come first. Wear protective gear like safety glasses and a dust mask. Familiarize yourself with the tools you are using and always follow best practices.
By learning these basic woodworking techniques, you’ll build a strong foundation for all your future projects!
Tips for jointing and laminating wood

Jointing and laminating wood are important techniques that enhance the strength and appearance of your projects. Here are some crucial tips to get you started:
1. Choose the Right Wood
Select wood pieces that have similar moisture content. This helps ensure that they will bond well and reduce the chances of warping or splitting over time.
2. Prepare the Edges
Before joining, make sure the edges are cut straight and smooth. Use a joiner or a table saw to create a clean edge. This allows for better contact when gluing.
3. Use Quality Wood Glue
Choose a high-quality wood glue designed for joints. Make sure to apply it evenly along the edge. Avoid using too much, as this can squeeze out and create a mess.
4. Clamp Securely
Use clamps to hold the pieces together while the glue sets. Ensure that the pressure is even across the joint to achieve a tight fit. Leave the clamps on for the recommended time according to the glue instructions.
5. Pay Attention to Grain Direction
When laminating, align the grain direction of each layer. This can enhance the visual appeal and strength of the final product. Make sure the grain runs in the same direction for a uniform look.
6. Sand Between Layers
If you are laminating multiple layers of wood, sand between them to ensure good adhesion. Use a fine grit sandpaper to create a smooth surface for the glue to adhere.
7. Allow Proper Curing Time
After clamping, allow the glue to cure fully before removing the clamps. Follow the manufacturer’s instructions for best results, which might take several hours or more.
By following these tips for jointing and laminating wood, you can create stronger, more lasting woodworking projects that look professional!
Finishing techniques that dazzle
Finishing techniques are crucial in woodworking as they enhance the beauty and durability of your projects. Here are some techniques that can help your work dazzle:
1. Sanding
Sanding is the first step to a great finish. Start with a coarse grit and gradually move to finer grits. This smooths the surface and helps the finish adhere better.
2. Staining
Staining wood enhances its natural color and grain. Choose a stain that complements your wood type. Apply with a clean cloth or brush, working it into the grain. Always test on a scrap piece first.
3. Painting
Painting can offer a completely different look. Use a high-quality paint designed for wood. For the best results, apply a primer first to help the paint adhere and achieve a smooth finish.
4. Varnishing
Varnish provides a durable finish and protects the wood from moisture. It comes in gloss, semi-gloss, and matte options. Apply multiple thin coats for the best results, allowing each coat to dry thoroughly.
5. Oiling
Oil finishes penetrate the wood, enhancing its natural beauty while providing protection. Common oils include linseed and tung oil. Apply with a cloth and buff to a shine after it soaks in.
6. Polyurethane
Polyurethane is a popular choice for a tough, protective finish. Available in water-based and oil-based formulas, it is easy to apply. Use a brush or spray, and sand lightly between coats for a smoother finish.
7. Waxing
Wax offers a soft, natural luster. After the finish has cured, apply a thin layer of paste wax with a cloth. Buff to achieve a shine and add a layer of protection against moisture.
By utilizing these finishing techniques, your woodworking projects can achieve a professional look and long-lasting durability that truly dazzles!
Common woodworking mistakes to avoid

Avoiding common woodworking mistakes can save you time and resources while improving your skills. Here are some frequent pitfalls to watch out for:
1. Skipping Measuring
Measurement is critical in woodworking. Always double-check your measurements before making cuts. Rushing through this step can lead to costly errors.
2. Not Using the Right Tools
Using improper tools can damage the wood and affect the quality of your work. Ensure you have the right tools for each task, including saws, drills, and clamps that are in good condition.
3. Ignoring Safety Precautions
Safety should always come first. Forgetting to wear safety gear such as glasses and ear protection can lead to injuries. Always follow safety guidelines when operating machinery.
4. Poor Joint Construction
Joinery is vital for the strength of your projects. Ensure your joints are secure and properly aligned. Invest time in learning techniques like dovetail or mortise-and-tenon joints.
5. Using Low-Quality Materials
Poor-quality wood can lead to project failure. Choose high-quality materials that suit your project to ensure durability and a professional finish.
6. Neglecting Finishing
Finishing adds beauty and protection to your work. Skipping this step can result in dull, unprotected wood. Always add the appropriate finish for the type of wood you are using, considering stains, paints, or oils.
7. Rushing the Process
Woodworking takes time and patience. Rushing can lead to mistakes that compromise the final product. Take your time with each step, especially when measuring and cutting.
By being aware of these common woodworking mistakes, you can enhance your skills and create beautiful, lasting projects. Practice makes perfect, so don’t be afraid to learn from your errors!
Maintaining your woodworking tools
Maintaining your woodworking tools is vital for ensuring they perform well and last for years. Here are some essential tips to keep your tools in top condition:
1. Regular Cleaning
After each use, wipe down your tools to remove sawdust, resin, and other debris. Use a damp cloth for cleaning, and avoid submerging them in water to prevent rust.
2. Lubrication
Many tools have moving parts that require lubrication to function smoothly. Use a light machine oil on hinges, blades, and gears to keep them operating efficiently. Check owner’s manuals for specific lubrication instructions.
3. Sharpening Blades
Keeping blades sharp is crucial for safety and performance. Use a bench grinder or sharpening stones to maintain edges on saw blades, chisels, and plane irons. Regularly inspecting and sharpening tools will enhance their cutting ability.
4. Proper Storage
Store tools in a dry area to prevent rust. Use wall-mounted racks, pegboards, or toolboxes to keep everything organized and easily accessible. Ensure they are protected from moisture and drastic temperature changes.
5. Inspect for Damage
Regularly inspect tools for signs of wear or damage. Look for cracks, loose handles, or worn parts. Address these issues immediately to avoid accidents or further damage.
6. Replacement Parts
Sometimes tools may need replacement parts. Consult the manufacturer for compatible parts and replacements. Using original parts ensures your tools function as intended.
7. Follow Manuals
Each tool comes with a user manual containing specific maintenance instructions. Always follow these guidelines for the best results in maintaining your equipment.
By following these maintenance tips, you can extend the life of your woodworking tools and maintain their performance, ensuring enjoyable and efficient woodworking experiences.
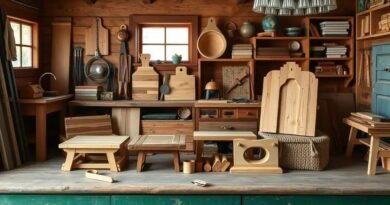
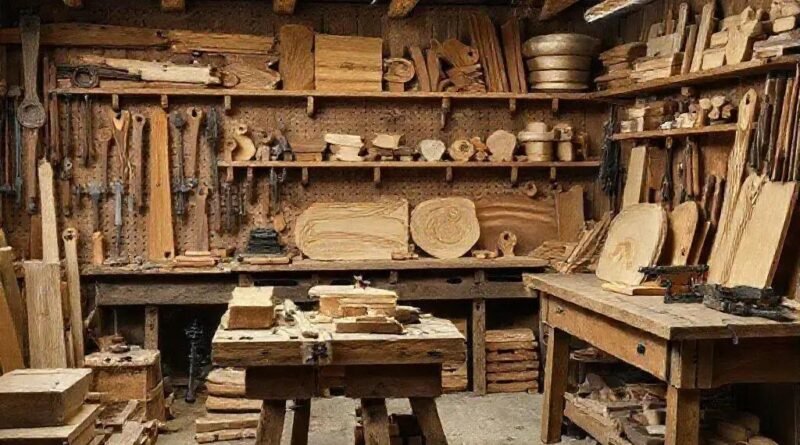
Creating a dedicated woodworking space

Creating a dedicated woodworking space can enhance your productivity and make woodworking more enjoyable. Here are essential tips to set up your own workshop:
1. Choose the Right Location
Select a location with ample space and good ventilation. Ideally, your workshop should be in a quiet area away from distractions. Consider a basement, garage, or a separate shed.
2. Organize Your Tools
Keep your tools organized for easy access. Use pegboards, shelves, and toolboxes to store items. Label everything to find what you need quickly, reducing time spent looking for tools.
3. Work Surface
A sturdy workbench is essential for wood projects. Make sure your work surface is at a comfortable height. You might also consider a folding table for additional space when needed.
4. Good Lighting
Proper lighting is crucial for detailed work. Use bright overhead lights and add task lighting over your workbench to illuminate your projects. Natural light can also help improve your workspace.
5. Safety First
Incorporate safety features in your workshop. Install fire extinguishers, and keep a first-aid kit handy. Ensure your workspace has proper ventilation to avoid inhaling harmful dust and fumes.
6. Dust Collection
Woodworking creates a lot of dust. Consider investing in a dust collection system or shop vac to keep your workspace clean and safe. Regularly clean dust from surfaces and tools.
7. Personal Touches
Add personal touches that inspire you, such as decorating the walls with project photos or hanging ideas. A comfortable chair or small area for breaks can also make your space more enjoyable.
By thoughtfully setting up a dedicated woodworking space, you will create an environment that fosters creativity and efficiency, making every project more enjoyable!
In summary, woodworking is a rewarding skill
Whether you’re a beginner or an experienced woodworker, understanding the essential techniques, tools, and workspace setup is crucial for success. From mastering the basics to avoiding common mistakes, each step you take will enhance your skills.
Investing time in maintaining your tools and creating a dedicated workspace will not only improve the quality of your projects but also make the process more enjoyable. Remember, every expert was once a beginner, so keep learning and experimenting!
Embrace your creativity, and enjoy the journey of woodworking as you build beautiful and functional pieces. Happy woodworking!
FAQ – Frequently Asked Questions About Woodworking
What tools do I need to start woodworking?
Essential tools include a saw, hammer, tape measure, square, chisels, and a power drill. A sturdy workbench is also important.
How can I improve my woodworking skills?
Practice regularly, learn from tutorials, and start with simple projects to gradually build your skills.
What types of wood are best for beginners?
Softwoods like pine are easier to work with and great for beginners. They are also more affordable and readily available.
How often should I maintain my woodworking tools?
Regularly clean your tools after each use, lubricate moving parts, and sharpen blades as needed to ensure optimal performance.
What are common mistakes to avoid in woodworking?
Avoid rushing measurements, using improper tools, neglecting safety, and skipping the finishing process.
How can a dedicated woodworking space help me?
A dedicated space allows for better organization, efficiency, and focus, making your woodworking projects more enjoyable and productive.