How to sharpen woodworking tools: a comprehensive guide for every woodworker
To sharpen woodworking tools effectively, regularly use appropriate sharpening techniques, maintain a clean workspace, and store tools properly to ensure longevity and optimal performance.
If you’ve ever wondered how to sharpen woodworking tools effectively, you’re not alone. Keeping your tools sharp is vital for smooth cuts and an enjoyable experience. Let’s dive into some practical tips that can make a big difference in your woodworking projects.
Understanding the importance of sharp tools
Understanding the importance of sharp tools in woodworking is essential for any craftsman. Sharp tools enhance performance, making cutting and shaping wood easier and more efficient. When tools are sharp, they require less force, which helps prevent mistakes and accidents.
Moreover, dull tools can lead to frustration and increased fatigue. This can affect both the quality of your work and your enjoyment of the woodworking process. A sharp chisel or plane allows for clean, precise cuts, which can significantly improve the finished product.
Additionally, maintaining sharp tools can prolong their lifespan. Frequent sharpening keeps blades in optimal condition, reducing the need for replacements. Investing time in tool maintenance pays off in better performance and durability.
Ultimately, ensuring that your woodworking tools are sharp not only contributes to better results but also enhances your overall woodworking experience. Taking the extra steps to keep your tools in top shape is worth the effort for any woodworker.
Essential tools for sharpening woodwork instruments

Having the right tools is crucial when it comes to sharpening woodwork instruments. Here are some essential tools you should consider.
Whetstones are a popular choice for sharpening knives, chisels, and plane blades. They come in various grits, allowing you to achieve a fine edge by starting with a coarse stone and finishing with a fine one.
Honing guides help maintain the correct angle while sharpening, making it easier to achieve a consistent edge. They are especially useful for beginners who might struggle with freehand sharpening.
Diamond plates are another excellent option, offering durability and faster sharpening compared to traditional stones. They are simple to use and require less maintenance.
Sharpening jigs provide precise angles for sharpening and are particularly helpful for specialized tools like jointers and specific woodworking chisels.
Strops can be used after sharpening to refine the edge even further. Using a stropping compound on a leather strop can give your blades a razor-sharp finish.
Finally, having a wire brush handy can help clean the tools after sharpening. Keeping the work area tidy contributes to better sharpening results.
Different sharpening techniques explained
There are several sharpening techniques that woodworkers can use to achieve a fine edge on their tools. Understanding these methods can improve your sharpening skills significantly.
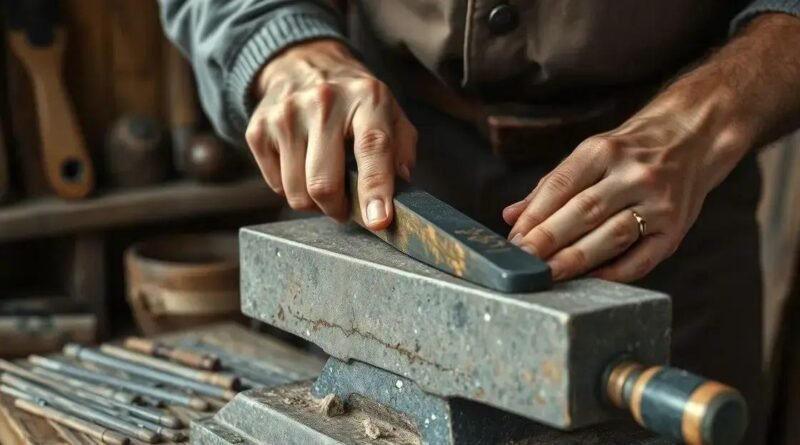
Freehand sharpening is one of the most common techniques. It requires practice but allows for flexibility in angles. Hold the blade against the sharpening stone and carefully move it back and forth, maintaining a steady angle to achieve a sharp edge.
Using a honing guide simplifies the process. This tool holds the blade at a consistent angle while you sharpen on a stone. This method is especially beneficial for beginners as it helps ensure uniform results.
Wet sharpening involves using a water stone or a wet wheel. This method helps keep the tool cool, preventing overheating and damage. Wet sharpening can produce a very sharp edge and is effective for a variety of tools.
Power sharpening with electric sharpeners can save time and effort. While quick, caution is needed to avoid removing too much material or overheating the blade.
Additionally, some woodworkers utilize stroping after sharpening. This involves polishing the edge on a leather strop often coated with polishing compound. Stroping refines the edge, making it razor-sharp, ideal for finishing work.
Step-by-step guide to honing chisels

Honing chisels is an essential skill for woodworkers aiming for precision and control. Follow these steps for effective honing:
Step 1: Gather your tools. You will need a honing guide for angle consistency, a medium or finer grit whetstone, and a leather strop for finishing.
Step 2: Prepare the whetstone. If you’re using a water stone, soak it in water for about 10-15 minutes. Ensure it is properly lubricated to avoid damage and to make honing smoother.
Step 3: Set the angle. Position your chisel in the honing guide at the desired angle, typically around 25 to 30 degrees. Secure it tightly so it doesn’t move during sharpening.
Step 4: Start honing. Place the chisel on the whetstone and move it back and forth, applying light pressure. Ensure you cover the entire edge evenly for a consistent result.
Step 5: Check for a burr. After honing, feel for a small burr on the back of the blade. This indicates that the edge is sharp enough.
Step 6: Hone the back. Flip the chisel and lightly hone the flat back for a few strokes. This helps ensure that the edge is truly sharp and squared up.
Step 7: Finish with a strop. Use a leather strop with polishing compound to refine the edge. Swipe the chisel across the strop, alternating sides to maintain symmetry.
By following this step-by-step guide, you can ensure your chisels remain sharp and ready for your woodworking projects, leading to smoother cuts and better results.
How to sharpen plane blades like a pro
Sharpening plane blades properly can enhance their performance significantly. Follow these steps to sharpen plane blades like a pro:
Step 1: Prepare the tools. You will need a whetstone (preferably a fine grit), a honing guide, and a leather strop for final polishing.
Step 2: Secure the blade. Remove the plane blade from the plane and place it in the honing guide at a 25 to 30-degree angle. Make sure it is tightly secured for consistent sharpening.
Step 3: Start with the whetstone. If you are using a water stone, soak it in water for about 10-15 minutes. For oil stones, apply a small amount of oil to lubricate the surface.
Step 4: Hone the bevel. Position the blade on the stone, using even pressure. Move the blade back and forth across the stone, maintaining a steady angle. Make sure to cover the entire bevel for an even edge.
Step 5: Check for a burr. After honing, check the back of the blade for a slight burr, which indicates effective sharpening. Feel carefully with your fingers to ensure it is present.
Step 6: Hone the back. Flip the blade over and lightly hone the flat back. This is crucial for achieving a sharp edge that cuts smoothly.
Step 7: Final polish with a strop. Use a leather strop to refine the edge. Apply a small amount of polishing compound to the strop and draw the blade across it, alternating sides to create a razor-sharp finish.
By following these steps carefully, you can sharpen your plane blades like a professional, enhancing their performance and providing you with cleaner cuts in your woodworking projects.
Maintaining edges on saw blades

Maintaining the edges on saw blades is crucial for ensuring clean cuts and prolonging the life of your tools. Here are several important steps to keep your saw blades in top condition:
Step 1: Regular inspection. Frequently check the teeth of your saw blades for wear and damage. Look for chips, dullness, or any signs of corrosion. Early detection can prevent poor performance.
Step 2: Cleaning. After each use, clean your saw blades to remove resin, pitch, and debris. Use a specialized blade cleaner or a mixture of soap and water. Be sure to dry the blades thoroughly to prevent rust.
Step 3: Sharpening. Regularly sharpen saw blades to maintain their cutting efficiency. Depending on usage, this might be every few months. You can use a sharpening stone, file, or professional sharpening service for best results.
Step 4: Correct storage. Store blades properly when they are not in use. Keep them in protective cases or on a dedicated wall-mounted rack to prevent accidental damage or dulling.
Step 5: Using the right technique. When cutting, use proper techniques to minimize stress on the blade. Avoid forcing the blade through material, as this can lead to premature dulling or damage.
Step 6: Replacement. If a blade is beyond sharpening, replace it instead of trying to repair it. Using damaged blades can lead to unsafe cutting conditions and inferior results.
By following these maintenance steps, you can ensure that your saw blades stay sharp and efficient, providing you with clean cuts in all your woodworking projects.
Preventive measures to avoid dulling tools
Taking preventive measures is key to avoiding dulling your woodworking tools. Implement the following strategies to keep your tools sharp for longer:
1. Use the right tool for the job. Always select the appropriate tool for the task at hand. Using a tool for activities it’s not designed for can lead to dullness or damage.
2. Maintain cutting surfaces. Ensure that your cutting boards and surfaces are clean and free of debris. Sand or scrape surfaces to prevent damage to your tools.
3. Practice proper techniques. When using hand tools or power tools, use controlled and steady motions. Rushing or forcing cuts can reduce the life of your tools.
4. Avoid accidental impacts. Be cautious when storing and handling tools to prevent them from hitting hard surfaces or each other. This can chip or dull the edges.
5. Clean tools after use. Regularly clean your tools after each use to remove dust and pitch buildup. Dry them properly to prevent rusting and dulling.
6. Store tools properly. Store tools in a dry place, preferably in protective cases or padded racks. This prevents exposure to moisture and accidental damage.
7. Perform regular maintenance. Schedule routine maintenance for your tools, including sharpening and lubrication. This proactive approach will help keep them in optimal condition.
By incorporating these preventive measures into your woodworking routine, you can significantly extend the lifespan of your tools and keep them sharp for many projects to come.
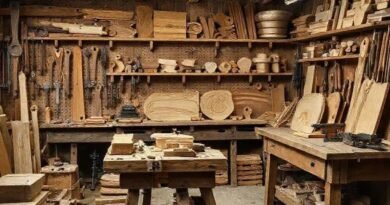
Best practices for tool care and storage

Caring for and storing your woodworking tools properly can extend their lifespan and ensure optimal performance. Follow these best practices for tool care and storage:
1. Clean your tools after each use. Remove dust, resin, and debris from your tools. Use a soft cloth or brush to keep them in good condition. For more stubborn residues, a gentle cleaner may be used.
2. Dry tools thoroughly. Always dry tools after cleaning to prevent rust and corrosion. Moisture can cause tools to degrade quickly, so ensure they are completely dry before storing.
3. Lubricate moving parts. Regularly apply a light oil or lubricant to joints and moving parts of tools, such as hinges or adjustment screws. This practice helps keep tools functioning smoothly.
4. Use protective covers. Consider using blade guards or case coverings for saws and other blades. Protective covers help prevent damage and keep edges sharp.
5. Store tools in a climate-controlled environment. Extreme temperature changes and humidity can harm tools. Store them in a cool, dry place away from direct sunlight.
6. Organize your workspace. Keep tools neatly arranged in a toolbox or on a pegboard. Organized storage prevents damage and helps you find tools easily when you need them.
7. Regularly inspect your tools. Make it a habit to check tools for damage or wear. Early detection of issues can save time and money in the long run.
By following these best practices, you will ensure that your woodworking tools remain effective, safe, and ready for use whenever you need them.
In summary, keeping your woodworking tools sharp and well-maintained
is essential for achieving quality results in your projects. By following effective sharpening techniques, practicing preventive care, and adhering to best storage practices, you can extend the life of your tools and enhance their performance.
Regular maintenance not only improves your woodworking experience but also ensures safety while working. Remember that the right tools, when cared for properly, can make all the difference in the quality and enjoyment of your craft.
So, invest time in maintaining your tools; it’s a small effort that yields significant benefits.
FAQ – Frequently Asked Questions about Tool Maintenance and Sharpening
Why is it important to keep woodworking tools sharp?
Keeping woodworking tools sharp ensures clean cuts, improves safety, and enhances overall performance during projects.
How often should I sharpen my tools?
The frequency of sharpening depends on usage, but it’s typically recommended to sharpen tools after every few uses or whenever you notice a decline in cutting performance.
What is the best way to clean my woodworking tools?
The best way to clean woodworking tools is to remove dust and residue with a soft cloth or brush after each use, and for stubborn materials, a gentle cleaner can be used.
How can I prevent my tools from getting dull?
To prevent dulling, use the right tools for the job, practice proper cutting techniques, and regularly clean and maintain your tools.
What type of storage is best for my tools?
Tools should be stored in a cool, dry place, preferably in protective cases or organized on pegboards to prevent damage and keep them easily accessible.
Are there any special tools needed for sharpening?
Yes, essential tools for sharpening include a good whetstone or sharpening system, honing guides for consistency, and strops for finishing the edge.