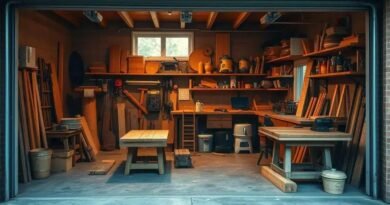
How to build a wooden bench step by step: your guide to creating comfort
To build a wooden bench step by step, start by selecting quality materials, gather the necessary tools, measure and cut the wood accurately, assemble the frame securely, and finish with sanding and staining for durability and aesthetics.
Are you looking for a fun and rewarding project? Building a wooden bench step by step is a fantastic way to enhance your outdoor space. With just a few tools and some creativity, you can create something both functional and beautiful!
Choosing the right materials for your wooden bench
Choosing the right materials is crucial for building a sturdy and beautiful wooden bench. First, consider the type of wood you want to use. Popular choices include cedar, pine, and oak. Each type has its own advantages. For instance, cedar is naturally resistant to weather and pests, making it ideal for outdoor benches.
Wood Characteristics
When selecting wood, think about its density, color, and grain pattern. Cedar is lightweight and has a pleasant aroma, while oak is very durable but heavier. Pine is economical and easy to work with but may require more maintenance.
Choosing the Right Dimensions
Next, consider the dimensions of your bench. The standard width is around 18 inches, while the length can vary depending on your available space. A comfortable height for the bench seat is typically 16-18 inches off the ground.
Protective Finishes
After choosing your wood, think about finishes. A good outdoor finish is essential to protect against weather damage. Look for stains or sealants that provide UV protection and waterproofing. This will help to extend the life of your bench.
Cost and Availability
Lastly, consider your budget and the availability of materials locally. Sometimes, reclaimed wood can add character to your bench and can be more affordable. Make sure to check for any defects in the wood to ensure quality in your final product.
Essential tools needed for building a bench

To build a wooden bench successfully, you will need several essential tools to make the process easier. Here is a list of the tools you should consider:
1. Measuring Tape
A good measuring tape is crucial to ensure accurate measurements. This will help you cut your wood to the correct lengths and widths.
2. Circular Saw
A circular saw is perfect for making straight cuts in your wood. If you’re new to woodworking, practice using this tool on scrap wood before starting your project.
3. Drill
A power drill is necessary for making holes and driving screws. It’s much quicker than using a manual screwdriver and ensures a secure fit.
4. Screwdriver
Even though a power drill is useful, a manual screwdriver can be beneficial for tightening screws in hard-to-reach areas.
5. Sanding Block or Orbital Sander
To achieve a smooth finish on your bench, you’ll need a sanding block or an orbital sander. This will help remove rough edges and prepare the surface for staining.
6. Safety Gear
Don’t forget your safety gear! Safety glasses and ear protection are important to keep you safe while you use power tools.
7. Wood Clamps
Wood clamps are useful for holding pieces of wood together while the glue dries or while you screw them into place.
8. Level
A level ensures that your bench sits evenly on the ground. An uneven bench can be unstable and uncomfortable.
Gathering these tools before you start will make your project go more smoothly and help you build a sturdy wooden bench!
Step-by-step guide to cutting wood
Cutting wood accurately is a key skill for building a wooden bench. Follow these step-by-step instructions to make sure your cuts are precise.
Step 1: Measure the Wood
Use your measuring tape to determine the lengths you need for each piece. It’s essential to double-check your measurements to avoid mistakes.
Step 2: Mark the Cut Line
Once you have your measurements, use a pencil to make a light mark on the wood. This mark will guide your cut. Make sure it is straight and clear.
Step 3: Secure the Wood
Before cutting, secure the wood on a stable surface using clamps. This will keep it from moving, ensuring a cleaner cut.
Step 4: Choose the Right Saw
For straight cuts, a circular saw is ideal. If you need to make intricate cuts, a jigsaw may be better. Make sure your saw blades are sharp and appropriate for the thickness of your wood.
Step 5: Make the Cut
Carefully guide the saw along your marked line. Keep a steady hand and let the saw do the work. Don’t rush the process!
Step 6: Smooth the Edges
After cutting, use a sanding block or orbital sander to smooth the edges. This helps prevent splinters and prepares the wood for finishing.
Step 7: Check Your Cut
Finally, measure your pieces once more to ensure accuracy. Trim any excess if needed. It’s better to check twice!
Following these steps will help you cut your wood safely and accurately, setting a solid foundation for your bench project.
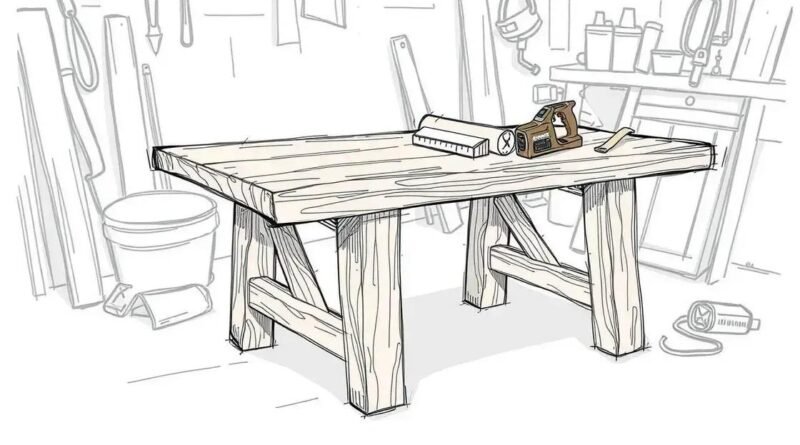
Assembling the bench frame properly

Assembling the bench frame is a crucial step in building your wooden bench. Follow these careful steps to ensure a strong and sturdy structure.
Step 1: Gather All Materials
Before starting, ensure you have all your pieces ready. You should have the seat supports, legs, and any cross braces cut to the correct sizes.
Step 2: Layout the Frame
Start by laying out the frame on a flat surface. Arrange the pieces how they will fit together. This helps you visualize the assembly and check for any missing parts.
Step 3: Attach the Legs
Begin by attaching the legs to the seat supports. Use wood screws to secure each leg at the corners. Pre-drill holes to prevent the wood from splitting. Make sure each leg is square to the supports for stability.
Step 4: Add Cross Braces
To strengthen the frame, add cross braces diagonally between the legs. This prevents wobbling and adds support. Use wood screws to attach them securely.
Step 5: Double-Check Alignment
As you assemble, continually check that everything is aligned properly. Use a level to ensure the frame is even and straight.
Step 6: Secure All Joints
Once everything is in place, go through and double-check each joint. Tighten any screws you may have missed to ensure everything is secure.
Step 7: Sand the Frame
After the assembly, sand any rough edges to ensure there are no splinters. This is important for both safety and a nice finish when you stain or paint the bench.
Following these steps will help you create a solid and durable bench frame that is ready for the next phase of your project!
Finishing touches: sanding and staining
Once your bench frame is assembled, it’s time for the finishing touches. This final stage involves sanding and staining to enhance the beauty and longevity of your wooden bench.
Sanding the Surface
Start with sanding the surface of the bench. Use a medium-grit sandpaper (around 120 grit) for the initial sanding to smooth out rough areas. Then, switch to a finer grit (220 grit) for the final pass to create an ultra-smooth finish.
Using an Orbital Sander
If you have one, using an orbital sander can save time and effort compared to manual sanding. Move the sander in the direction of the grain to avoid scratches and ensure an even finish.
Cleaning the Dust
After sanding, it is crucial to remove all dust. Use a damp cloth to wipe down the surfaces, ensuring that no dust remains. This step is important for a smooth application of stain or sealant.
Selecting the Right Stain
When choosing a stain, consider the final look you want for your bench. Wood stains come in various colors and shades that can enhance the natural grain of the wood. Pick a product that also includes UV protection for outdoor use.
Applying the Stain
Use a brush or a clean cloth to apply the stain evenly. Work in small sections and follow the manufacturer’s instructions for the best results. Allow the first coat to dry completely before applying additional coats if necessary.
Sealing the Wood
After the stain has dried, apply a clear sealant to protect the wood from water and wear. This can be a polyurethane finish or an exterior-grade sealant if the bench will be outdoors.
Final Inspection
Finally, inspect your work. Ensure that the stain is even and that there are no areas missed. Check that the sealant is applied thoroughly to extend the life of your beautiful bench.
Tips for maintaining your wooden bench

Maintaining your wooden bench is essential for its longevity and appearance. Here are some helpful tips to keep your bench looking great.
1. Regular Cleaning
Make it a habit to clean your bench regularly. Use a damp cloth to remove dirt and debris. For outdoor benches, you may need to clean them more often due to exposure to the elements.
2. Inspect for Damage
Periodically check your bench for any signs of wear or damage. Look for cracks, splintering, or any signs of mold or mildew. Early detection can prevent more extensive damage.
3. Reapply Stain or Sealant
Over time, the protective layer of stain or sealant may wear off. Depending on the climate, you should reapply a stain or sealant every 1-3 years. This will protect the wood from moisture and UV rays.
4. Avoid Excessive Weight
Be mindful of the weight limits of your bench. Avoid sitting or placing heavy objects on it to prevent warping or breaking.
5. Store Properly
If possible, store your bench indoors during harsh weather conditions. If it must be left outside, consider using a cover to protect it from rain, snow, or intense sunlight.
6. Address Issues Promptly
If you notice any issues, such as loose screws or damaged planks, address them right away. This helps maintain the structure of the bench and ensures safety while using it.
7. Keep it Dry
Make sure to keep the bench as dry as possible. Avoid leaving it in standing water or letting debris accumulate, as this can lead to mold and decay.
By following these simple tips, you can ensure that your wooden bench remains a beautiful and functional piece for many years.
Ideas for customizing your bench
Customizing your wooden bench can make it a unique piece that reflects your style. Here are some creative ideas to personalize your bench.
1. Unique Staining Techniques
Instead of the standard stain, try using techniques like whitewashing or a gel stain for a rich, multi-dimensional look. Experiment with different colors to match your outdoor decor.
2. Add Cushions
To enhance comfort, consider adding custom cushions on the bench. Choose fabrics that complement your outdoor design and are weather-resistant for durability.
3. Decorative Carvings
If you enjoy woodworking, try adding some decorative carvings to the bench. You can carve your initials or a unique design that reflects your personality.
4. Incorporate Planters
Design the bench with built-in planters on the sides. This adds greenery and brings a lively touch to your bench area.
5. Use Colorful Paint
Instead of stain, consider painting your bench in bright, cheerful colors. Using exterior paint will help protect the wood from the elements while giving it a fresh look.
6. Add a Backrest
Enhance functionality by adding a backrest to your bench. This not only provides more comfort but can also create opportunities for unique designs, such as latticework.
7. Create a Theme
Consider creating a theme for your bench based on your favorite style, like rustic, modern, or coastal. Select colors, fabrics, and accessories that match this theme for a cohesive look.
By implementing these customization ideas, you can transform your wooden bench into a personal statement piece that you will love for years.
Common mistakes to avoid when building a bench

Building a wooden bench can be a rewarding project, but there are some common mistakes that DIY enthusiasts might encounter. Here are some pitfalls to avoid.
1. Not Measuring Twice
One of the biggest mistakes is failing to measure twice before cutting. Always double-check your measurements to ensure that your pieces fit together perfectly.
2. Skipping the Wood Quality Check
Using low-quality or damaged wood can lead to problems later. Inspect your wood for knots, cracks, or imperfections that may affect the strength of your bench.
3. Ignoring Safety Precautions
Neglecting safety gear, such as goggles and gloves, can lead to accidents. Always prioritize safety when using power tools.
4. Rushing the Assembly
Hurrying through the assembly process often results in mistakes. Take your time to ensure that each joint is secure and properly aligned.
5. Not Preparing the Wood Properly
Failing to sand the wood before assembly or finishing can result in rough edges and a poor finish. Be sure to sand all surfaces for a smooth appearance.
6. Choosing the Wrong Hardware
Using the wrong screws and fasteners can lead to instability. Choose hardware that is suitable for outdoor use if your bench will be outside.
7. Neglecting to Waterproof
For outdoor benches, not applying a waterproof sealant can cause wood rot over time. Always finish your bench with a good sealant to protect it from the elements.
8. Forgetting to Allow for Expansion
Wood expands and contracts with temperature changes. Be sure to allow for this in your design to prevent cracking and warping.
Avoiding these mistakes will help ensure that your bench is not only beautiful but also durable and functional.
In Summary: Building Your Ideal Wooden Bench
Creating a wooden bench can be a fun and rewarding project. By following the step-by-step guide, you can ensure that your bench is sturdy and stylish.
Remember to avoid common mistakes such as poor measurements or using low-quality materials. Personalizing your bench with unique designs and finishes will make it a perfect addition to your space.
Finally, maintaining your bench properly will keep it looking great for years to come. With a little care and creativity, your wooden bench can become a beloved piece in your home or garden.
FAQ – Frequently Asked Questions About Building a Wooden Bench
What type of wood is best for building a bench?
Cedar, pine, and oak are popular choices. Cedar is weather-resistant, while pine is affordable and easy to work with, and oak is very durable.
How often should I clean and maintain my wooden bench?
Regular cleaning is recommended, ideally every few weeks, and you should inspect for damage and reapply stain or sealant every 1-3 years.
What tools do I need to build a wooden bench?
Essential tools include a measuring tape, circular saw, drill, sanding block, and wood clamps.
How can I customize my wooden bench?
You can customize your bench by adding unique stains, cushions, carvings, or even built-in planters to match your style.
What common mistakes should I avoid when building a bench?
Avoid mistakes such as inaccurate measurements, using low-quality wood, neglecting safety gear, and rushing through assembly.
Is waterproofing necessary for an outdoor bench?
Yes, applying a waterproof sealant is essential for protecting your bench from moisture and extending its life.