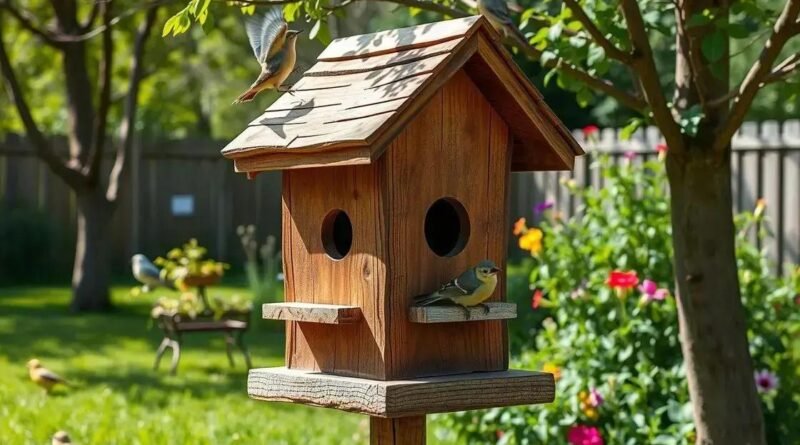
How to build birdhouses with woodworking plans easily and affordably
Building birdhouses involves selecting untreated wood, ensuring proper size for entrance holes, placing them in safe locations, and performing regular maintenance to provide secure habitats for various bird species.
Are you ready to learn how to build birdhouses with woodworking plans? It’s not just about creating homes for birds; it’s also a rewarding woodworking project that brings nature closer to you. Let’s dive into the essentials.
Choosing the right materials for birdhouses
Choosing the right materials for birdhouses is crucial for ensuring the comfort and safety of your feathered friends. Wood is the best choice because it provides good insulation and is durable against weather conditions. Untreated cedar or pine are popular options that resist warping and are safe for birds.
Avoid using materials like pressure-treated wood, as it contains chemicals harmful to birds. Also, steer clear of metal, as it can become too hot in direct sunlight, posing risks to the birds that inhabit the house.
Additionally, consider using natural finishes that are non-toxic. A simple coat of linseed oil can protect the wood while keeping it safe for wildlife.
Ensure to check the thickness of the wood as well; a thickness of at least 3/4 inch prevents predators from breaking in, while still providing enough space for the birds to feel secure.
Lastly, always source your materials from sustainable suppliers to ensure that your project has a minimal environmental impact. This practice not only benefits the birds but also contributes positively to the ecosystem.
Essential woodworking tools for beginners

Getting started with woodworking requires a few essential tools that make the process smoother and more enjoyable. Hand saws are one of the first tools every beginner should acquire. They are ideal for making precise cuts and are easy to control.
Another important tool is a chisel set. Chisels allow for fine detail work and help shape the wood as needed. Look for a set that includes several sizes to handle different tasks.
A measuring tape is also crucial. Accurate measurements are essential in woodworking, so invest in a reliable measuring tape to ensure your cuts and joints fit perfectly.
A level is necessary to guarantee that your birdhouses are straight and stable. An inexpensive bubble level can do the job effectively.
A drill is necessary for making holes for screws and dowels. A cordless drill is convenient and can handle various tasks, from assembling birdhouses to hanging them.
Finally, don’t forget about a sanding block or an orbital sander to smooth the surfaces of your wood. Smooth surfaces not only look better but also protect the birds from splinters.
Step-by-step guide to building birdhouses
Building a birdhouse can be a rewarding project. Let’s break it down into simple steps to make it easy to follow. Start by gathering your materials, including wood, nails, screws, and glue.
Next, measure and cut your wood pieces according to the dimensions you’ve chosen for your birdhouse. Common dimensions include a 6\” wide by 8\” tall structure with a 6\” depth.
After cutting, assemble the walls by joining the side pieces to the back piece. Make sure the edges are aligned. Use a level to ensure they are straight.
Now, add the floor. Nail it securely to the bottom of the walls. Leave small drainage holes in the floor to prevent water accumulation.
Once the walls are up, attach the roof. Cut two pieces of wood to form a slanted roof that will shed water. The roof should extend a bit over the walls to provide extra protection.
Next, drill a hole for the entrance. A diameter of about 1 1/2 inches is suitable for small birds like bluebirds. Ensure the hole is placed at the right height from the floor.
Now, you can sand any rough edges to make it safe for birds. It’s important to smooth out all surfaces.
Finally, paint or finish the birdhouse using non-toxic products that will withstand the weather. Once painted, let it dry completely before placing it outside.
Design variations for different bird species

When designing birdhouses, it’s important to consider the different species of birds that may occupy them. Each type of bird has unique needs that can influence the design and dimensions of the birdhouse.
For instance, bluebirds prefer houses with a floor size of about 5″ x 5″ and a height of 8″. The entrance hole should have a diameter of 1 1/2″ and be placed 6″ above the floor. This design helps them feel safe from predators.
On the other hand, wrens like smaller birdhouses with a 4″ x 4″ floor and an entrance hole of 1″ in diameter. They also appreciate a deeper cavity to provide a cozy space for nesting.
Chickadees thrive in houses of similar size to bluebirds but prefer an entrance hole that is around 1 1/8″ wide, ensuring they can escape from larger predators. Their birdhouses can also include a ventilation hole near the top to keep the interior cool.
Additionally, swallows usually require wider eaves, so their houses should feature overhangs to protect them from the rain. A good size for a swallow house is about 6″ x 6″ with a 1 1/4″ entrance.
Lastly, remember that adding a perch can be beneficial for some species, giving them a place to rest and survey their surroundings, but it can also make them vulnerable to predators. Therefore, consider the specific needs of each bird species when designing your birdhouse.
Finishing touches: painting and weatherproofing
Adding the finishing touches to your birdhouse is essential for both aesthetics and durability. Painting your birdhouse not only enhances its appearance but also provides protection against the elements.
When choosing paint, opt for non-toxic, water-based paints. These are safe for birds and the environment. Avoid bright colors that could scare away potential inhabitants. Instead, consider natural tones that blend in with the surroundings.
Before applying paint, make sure the wood is clean and dry. Apply a thin coat and allow it to dry thoroughly. You can add a second coat for better coverage, ensuring you cover all surfaces, including the roof and edges.
Weatherproofing is another critical step. Applying a waterproof sealant will help protect the wood from moisture damage. Choose a sealant that is also non-toxic to make sure it won’t harm the birds.
Make sure to pay special attention to areas where water may accumulate, like the roof edges and joints. This will prevent rot and keep the birdhouse sturdy over time.
Finally, remember to allow adequate time for the paint and sealant to dry completely before placing the birdhouse outdoors. This way, you ensure a safe and inviting home for your feathered friends.
Tips for placing birdhouses in your yard

Placing birdhouses correctly in your yard can attract more birds and provide a safe environment for them. Start by selecting a quiet location away from loud noises and heavy foot traffic. Birds prefer nesting sites where they feel safe from disturbances.
Next, consider the height of your birdhouse. Most species like bluebirds, wrens, and chickadees prefer their homes to be 5 to 10 feet off the ground. Ensure the entrance is facing away from prevailing winds to protect nesting birds from harsh weather.
Make sure to have natural cover nearby, such as trees or shrubs. Birds feel more secure when they can easily access protective foliage. Place the birdhouse within 100 feet of these natural features to help them find their shelter quickly.
It’s also important to keep predators in mind. Position the birdhouse at least 10-30 feet away from areas where predators like cats or raccoons might lurk. Consider adding a predator guard to the entrance hole for extra safety.
Finally, place your birdhouse in a spot that gets some sunlight but also offers shade during the hottest part of the day. This balance helps keep the interior temperature comfortable.
Common mistakes to avoid when building birdhouses
When building birdhouses, avoiding common mistakes can make a significant difference in their success. One major error is using pressure-treated wood. This type of wood contains chemicals that can harm birds, so always opt for untreated wood like cedar or pine.
Another mistake is neglecting ventilation and drainage. Birdhouses need ventilation holes at the top and drainage holes at the bottom to prevent moisture buildup. Without these, nests can become damp and unlivable, leading to health issues for the birds.
Additionally, ensuring the entrance hole is the right size is crucial. If the hole is too large, larger predators may invade; if too small, the birds may feel cramped. Always research the specific dimensions needed for your intended bird species.
Failing to properly secure the roof is also a common issue. A loose or improperly fitted roof can lead to leaks, which can damage the nest inside. Make sure the roof fits tightly and is secure to withstand strong winds and rain.
Lastly, many builders overlook placement. Birdhouses should be positioned away from busy areas and in a quiet space where birds feel safe. Avoid placing them too close to feeders which may attract predators.
Maintenance tips for lasting birdhouses

Proper maintenance of birdhouses is essential to ensure they last and remain safe for birds. Start by inspecting the birdhouse at the end of each nesting season. Look for any signs of wear or damage, like cracks or holes that may need repairs.
Next, thoroughly clean the birdhouse after the birds have left. Remove old nesting materials and debris using a scraper or brush. This helps prevent parasites and diseases from affecting future nesters. You can use a mild soap solution to disinfect the interior, but ensure it dries completely before placing it back outside.
Make sure to check the roof and drainage holes to ensure they are functioning properly. Clear any debris like leaves or twigs that may block water from draining. Proper drainage keeps the interior dry and discourages mold growth.
If the birdhouse is painted or stained, check the condition of the finish regularly. Reapply non-toxic paint or sealant every few years to protect the wood from moisture and UV rays. This preserves the birdhouse and enhances its appearance.
Finally, consider relocating the birdhouse occasionally, if necessary. If you notice predators becoming a problem, moving it to a more secure location can help protect the birds.
In Conclusion: Building Birdhouses for a Brighter Future
Creating birdhouses is a fun and rewarding project. By following the right steps, choosing the best materials, and ensuring proper placement, you can provide safe homes for many bird species.
Regular maintenance will keep your birdhouses in great shape, allowing them to last for many years. Remember to clean and inspect them after each nesting season to ensure they remain safe and inviting.
With your efforts, you can help support local wildlife and enjoy the beauty of birds in your backyard. Embrace the joys of birdwatching and the satisfaction of knowing you’ve made a difference.
FAQ – Questions about Building Birdhouses
What materials are best for building birdhouses?
The best materials are untreated wood, like cedar or pine, which are safe for birds and provide good insulation.
How should I clean my birdhouse?
Clean it after each nesting season by removing old nesting materials and using a mild soap solution to disinfect the interior.
What size should the entrance hole be?
The entrance hole size varies by species but typically should be about 1 1/8″ to 1 1/2″ in diameter for small birds.
Where is the best location to place a birdhouse?
Place birdhouses in quiet areas, 5 to 10 feet off the ground, with natural cover nearby, and away from predators.
How often should I check on my birdhouses?
Inspect your birdhouses at least once a year at the end of the nesting season to check for damage and repairs needed.
Can I paint my birdhouse?
Yes, but use non-toxic, water-based paint that is safe for birds. Avoid bright colors that may scare the birds away.