5 Woodworking Projects For Outdoor Areas To Start Off The Spring
Outdoor woodworking projects enhance your space by adding beauty and functionality, with maintenance tips like regular inspections, cleaning, and applying protective finishes to ensure their longevity.
Woodworking projects for outdoor areas can transform your backyard into a stunning oasis. Do you ever feel inspired to create something meaningful and functional? Let’s explore some exciting ideas to get your creative juices flowing.
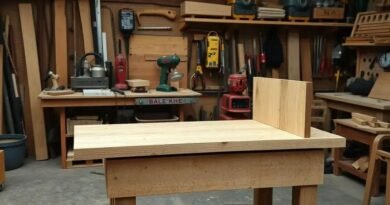
Creating attractive garden furniture
Creating attractive garden furniture can enhance the beauty and functionality of your outdoor space. With just a few tools and materials, you can make pieces that are not only stylish but also durable.
Choosing the Right Materials
When selecting materials, consider using weather-resistant wood such as cedar or teak. These woods are known for their durability and natural resistance to the elements, making them perfect for outdoor furniture.
Designing Your Furniture
Start by sketching your ideas. Think about the type of furniture you need: chairs, tables, or benches? Keep functionality in mind. A multi-purpose bench can serve as both seating and storage.
Building the Furniture
Once you have a design, gather your materials and tools. Basic tools like a saw, drill, and sandpaper will be essential. Follow your design carefully, making sure to check measurements to ensure everything fits together.
Finishing Touches
Finishing your furniture is vital for protection against the elements. Applying a good quality outdoor sealant can extend the life of your creations. You may also want to paint or stain your furniture for added style.
Adding Comfort and Style
Don’t forget to add cushions or pillows for comfort! Choose outdoor fabrics that are resistant to fading and moisture. This will not only enhance the look but also make your furniture more inviting.
DIY outdoor storage solutions

Creating DIY outdoor storage solutions is a practical way to keep your garden tidy and organized. Whether it’s for gardening tools or outdoor furniture, having dedicated storage makes everything easier to find.
Choosing the Right Type of Storage
Consider what you need to store. Tool sheds are perfect for keeping tools out of sight, while storage benches can serve dual purposes. Pick a design that fits your specific requirements.
Gathering Your Materials
For outdoor storage, choose materials that can withstand the weather. Wood treated for outdoor use is ideal. You’ll also need screws, hinges, and a weatherproof finish to protect your storage unit.
Building Your Storage Solution
Start your project by sketching out a simple design. Keep it straightforward. Cut your wood to size and follow your plan closely. It’s important to ensure that everything fits together securely.
Adding Functionality
Incorporate shelves for tools or hooks for hanging items. Use a sliding door or a hinged lid to make access easy. These features will enhance the usability of your storage solution.
Finishing Touches
Finish your project with a weather-resistant paint or sealant. This will not only make your storage look great but also protect it from the elements. Consider adding handles for easy opening.
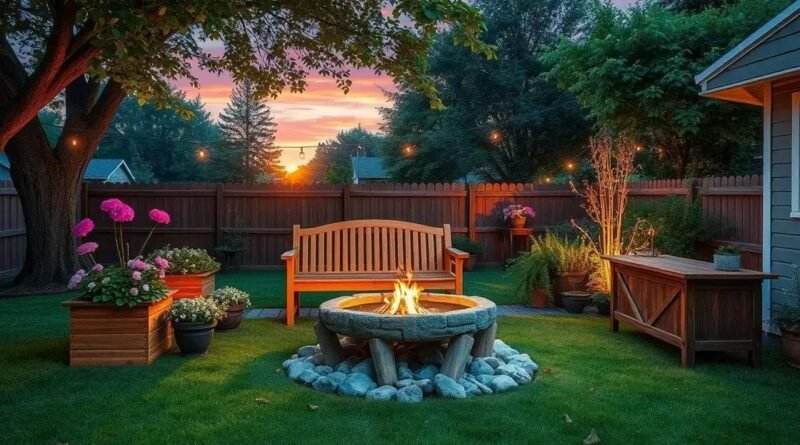
Building a cozy fire pit
Building a cozy fire pit can be a great addition to your outdoor space. It creates a warm atmosphere for gatherings with friends or family. Plus, it’s a fun DIY project!
Choosing the Location
The first step is to select the right spot for your fire pit. Look for a flat area away from overhanging branches and structures. Ensure it’s at least 10 to 15 feet from any flammable materials.
Gathering Your Materials
You will need bricks, stones, or a fire ring to form the base of your fire pit. Also, gather gravel for drainage and heat-resistant stones for the inner circle. These materials help to contain the fire safely.
Constructing the Fire Pit
Start by marking the area for your fire pit. Dig a shallow pit and lay down a base of gravel. Then, stack the stones or bricks in a circular shape to create your fire pit wall. Make sure it’s stable and compact.
Creating Seating around the Fire Pit
Once your fire pit is built, consider adding seating around it. This could be benches, chairs, or logs that blend with your outdoor decor. Make sure the seating is at a comfortable distance from the fire.
Safety Precautions
Always prioritize safety. Keep a bucket of water or a fire extinguisher nearby when using the fire pit. Also, avoid burning softwoods, as they produce more smoke. Use seasoned hardwoods for a cleaner burn.
Crafting stylish planters and raised beds

Crafting stylish planters and raised beds is a great way to enhance your garden’s aesthetics and functionality. These projects are perfect for adding color and organization to your outdoor space.
Selecting Materials
Start by choosing materials that fit your style and budget. You can use wood, concrete, or metal. Cedar is a popular choice for its natural resistance to rot.
Designing Your Planters
Think about the size and shape of your planters. Rectangular designs are great for vegetables, while round ones can showcase flowers. Make sure to consider the plants you will be growing to ensure adequate space.
Building the Planters
Cut your materials to the desired size and assemble them using screws or nails. Ensure that there are drainage holes at the bottom to prevent waterlogging. If you’re using wood, consider lining the insides with landscape fabric to keep the soil from spilling out.
Creating a Stylish Look
Once your planters are built, it’s time to paint or stain them. Choose colors that complement your outdoor space. For an extra touch, you can add decorative elements like stencils or carvings.
Planting and Maintenance
Fill your planters with nutrient-rich soil and plant your chosen flowers or vegetables. Regular maintenance is key to keeping your planters looking good. Water your plants regularly and refresh the soil as needed.
Developing a garden path or deck
Developing a garden path or deck adds functionality and beauty to your outdoor space. This project can enhance the overall appeal of your garden while providing a practical route through it.
Choosing the Right Materials
Start by selecting materials that suit your style and the climate. Common choices include stone, bricks, wood, or gravel. Each material offers different aesthetics and durability, so choose based on your needs.
Planning Your Design
Design your path or deck with both aesthetics and functionality in mind. Consider how the layout will flow through your garden and the purpose it will serve. Make sure to incorporate curves or straight lines that complement existing features.
Preparing the Area
Clear the area where the path or deck will go. Remove grass, weeds, and debris. For a more stable surface, consider laying down a weed barrier fabric. This will prevent weeds from growing through your new path.
Building the Path or Deck
Start by laying a strong foundation. For paths, use sand or gravel to create a stable base. Lay the chosen materials in your desired pattern. If building a deck, ensure you have a solid frame and check for level before securing your boards.
Finishing Touches
After construction, enhance your path or deck with decorative elements. Consider adding lights, edging, or even flower beds along the sides. These details can create an inviting atmosphere while guiding guests through your garden.
Making unique outdoor decorations

Making unique outdoor decorations allows you to showcase your creativity while enhancing your outdoor space. These decorations can personalize your garden or patio and make it feel inviting.
Gathering Inspiration
Start by exploring different styles and materials. Whether you prefer rustic, modern, or whimsical designs, find inspiration online or in magazines. Take notes or create a mood board to visualize your ideas.
Choosing Your Materials
Use a variety of materials like wood, metal, or recycled items. Old pallets can become rustic furniture, while glass bottles can be transformed into beautiful lanterns. Be creative and think outside the box!
Crafting the Decorations
Once you have your materials, it’s time to start crafting. Basic tools like a saw, nails, and paint can help you bring your ideas to life. Remember to follow safety guidelines when using power tools. Let your imagination guide you as you create.
Incorporating Plants
Add greenery to your decorations by incorporating plants. Use terracotta pots, hanging planters, or even repurposed containers. Plants can add color and life to your decor, making it feel more vibrant.
Displaying Your Creations
Think about where to place your new decorations. Arrange them in areas where they can stand out, such as near pathways, seating areas, or flower beds. Make sure they complement your existing landscape.
Constructing kid-friendly play areas
Constructing kid-friendly play areas transforms your outdoor space into a fun and safe environment for children. These areas promote physical activity and creativity, making them essential for families.
Selecting a Safe Location
Begin by choosing a flat, open area away from hazards like busy roads or sharp objects. Make sure the ground is level to prevent falls and injuries. A spot with good drainage is also ideal to keep the play area dry.
Choosing the Right Equipment
When selecting play equipment, opt for items designed for children’s safety. Swing sets, slides, and climbing structures should meet safety standards. Look for materials that are sturdy yet soft enough to prevent injuries.
Creating Soft Surfaces
Install soft surfaces under and around play equipment to cushion falls. You can use rubber mulch, sand, or grass. These materials can help absorb impact and provide a safe environment for kids to play.
Adding Fun Features
Enhance the play area with fun features like a sandbox, climbing wall, or water play station. These additions will keep children engaged and encourage imaginative play. Consider including seating for parents to supervise safely.
Regular Maintenance
To ensure safety, conduct regular maintenance checks. Look for loose parts or worn-out surfaces. It’s essential to replace or repair equipment as needed to keep the play area safe and enjoyable for kids.
Tips for maintaining outdoor woodworking projects

Maintaining outdoor woodworking projects is crucial for ensuring their longevity and appearance. Here are some important tips to keep your creations looking their best.
Regular Inspections
Inspect your projects regularly for signs of wear or damage. Look for cracks, splinters, or loose joints. Early detection allows for timely repairs, preventing more extensive damage later.
Cleaning Your Woodwork
Keep your outdoor wood pieces clean. Use a soft brush or cloth to remove dirt and debris. For tougher stains, a mild soap mixed with water can help. Avoid harsh chemicals that can damage the wood finish.
Protecting from the Elements
Apply a protective finish such as sealant or outdoor paint. This helps to repel moisture and protects against UV rays. High-quality sealants can provide a barrier against rain and sunlight, prolonging the life of your projects.
Regular Maintenance
Perform maintenance tasks such as tightening screws and bolts to keep your pieces sturdy. Sand rough areas to prevent splinters and apply touch-up paint as necessary to keep them looking fresh.
Storage Considerations
When not in use, consider storing your outdoor wood projects in a covered area or using protective covers. This can significantly reduce the impact of weathering and extend their lifespan.
In conclusion, enhancing your outdoor space
Enhancing your outdoor space with woodworking projects can be both fun and rewarding. From constructing cozy fire pits to crafting stylish planters, each project adds beauty and functionality to your environment.
Regular maintenance is key to preserving your creations and ensuring they last for years. By following simple tips, like cleaning, applying protective finishes, and conducting inspections, you can keep your woodworking projects looking great.
Remember, the effort you put into these projects not only enhances your outdoor space but also creates enjoyable areas for family and friends. Embrace your creativity and transform your yard into a personal paradise!
FAQ – Frequently Asked Questions about Outdoor Woodworking Projects
What types of outdoor woodworking projects are suitable for beginners?
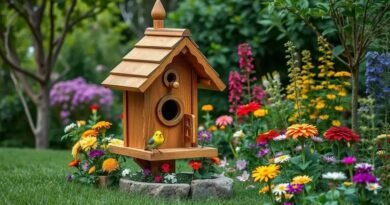
Simple projects like birdhouses, garden benches, or small planters are great for beginners and can help build your skills.
How do I protect my outdoor wood furniture from weather damage?
Applying a high-quality sealant or outdoor paint can protect your wood furniture from moisture and UV rays, extending its life.
What materials are best for outdoor woodworking?
Cedar, redwood, and treated lumber are excellent choices for outdoor projects due to their natural resistance to decay and insects.
How often should I clean my outdoor woodworking projects?
It’s a good idea to clean your projects at least once a season to remove dirt, debris, and mildew, keeping them looking their best.
Can I repaint my outdoor wood projects?
Yes, you can repaint your outdoor projects. Make sure to properly sand and clean the surface before applying a new coat of paint or stain.
What should I do if I notice damage to my outdoor woodwork?
Inspect the damage closely; small cracks can often be sanded down and treated, while larger damage may require replacing parts or sections.